
7 Emergency Preparedness Steps Without the Doomsday Drama
Last Updated: November 15, 2026
Quick Summary
Practical emergency preparedness means getting your household ready for the disasters most likely to affect you, without bunkers or fear. Start with three days of water and food you actually eat, copies of key documents, a working flashlight, and a family plan everyone knows. Small, boring steps keep you comfortable and in control when something goes wrong.
- Store one gallon of water per person per day for at least three days.
- Build a one-page household plan with two meeting spots and an out-of-area contact.
- Gather supplies you already own first, then add one extra non-perishable item each grocery trip.
- Check your kit twice a year, in spring and fall, to rotate water, food, batteries, and medications.
- Text messages often get through when calls don't, so agree on a check-in time.
Table of Contents
- Practical Preparedness vs. Doomsday Prepping: What's the Difference
- Your Emergency Preparedness Checklist for Beginners
- Low-Cost Emergency Preparedness: Start With What You Already Own
- Building Your Emergency Food and Water Supply
- How to Build a Household Emergency Plan Your Family Will Actually Use
- Planning for the Emergencies You're Most Likely to Face
- Keeping Your Kit Ready: Maintenance and Readiness Checks
- Grab Your Free First 72 Hours Checklist and Get Started
- Frequently Asked Questions
Practical Preparedness vs. Doomsday Prepping: What's the Difference
Realistic emergency preparedness is the practice of getting your household ready for the disasters most likely to affect you, without the bunkers, the politics, or the fear.
That distinction matters more than most people think.
Doomsday prepping often assumes a total collapse. It leans on stockpiles, isolation, and worst-case fantasy.
The Ready.gov emergency preparedness guidance frames it simply. Real readiness is about having a plan, a kit, and the skills to stay calm.
What Realistic Readiness Actually Looks Like
Realistic readiness is small, boring, and effective. It looks like this:
- Three days of water and food you actually eat
- Copies of key documents in one grab-and-go folder
- A flashlight that works, plus spare batteries
Notice what's missing: no gas masks, no underground shelter, no talk of civil unrest. Just calm, practical steps.
The goal is simple. When something goes wrong, you stay comfortable and in control. That's it.
Your Emergency Preparedness Checklist for Beginners
An emergency preparedness checklist for beginners should start with what you already have and build from there.
Here's where to start:
- Water: one gallon per person per day for at least three days
- Food: three days of non-perishables you'll actually eat
- Light: a flashlight or two, plus spare batteries
That's a real starting point. Most people can pull half of it together today.
If you want a deeper list, our guide on what are the essential items for disaster preparedness breaks down each category.
The trick is to start small. A beginner who gathers five items this week beats someone who plans a perfect kit and buys nothing.
Low-Cost Emergency Preparedness: Start With What You Already Own
Low-cost emergency preparedness begins with an honest walk through your own home. Most households already own more than they realize. The job is finding it, checking it, and putting it where you can grab it.
Open a few drawers. You probably have:
- A flashlight in the junk drawer
- Spare batteries in a kitchen cabinet
- Bandages and pain relievers in the bathroom
Gather those first. Then fill the gaps one item at a time.
Free and Cheap Ways to Build Supplies This Month
You don't need a big budget. Try these:
- Refill a jug with tap water. Clean, food-grade containers work fine for short-term storage.
- Print your documents. Copies cost pennies at a library.
- Download a free checklist and use it to spot what's missing.
- Buy one extra non-perishable item each grocery trip.
Small habits add up fast. A few dollars a week builds a real kit in a couple of months. No debt, no drama.
Building Your Emergency Food and Water Supply
Building an emergency food and water supply comes down to two rules: store what you eat, and rotate it before it expires. That's the whole game. Buy shelf-stable food you actually like, and use it in normal meals so nothing goes stale.
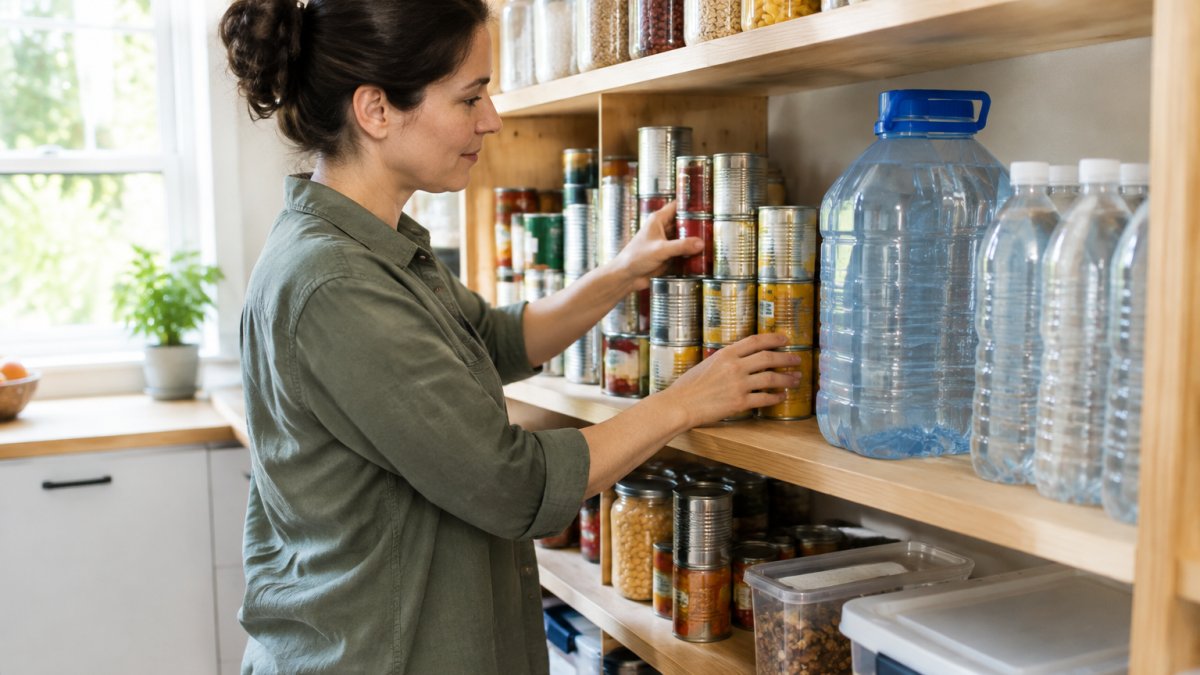
Water is the priority. The FEMA guidance on water storage recommends one gallon per person per day for drinking and basic hygiene.
If lifting heavy jugs is a problem, a smaller container helps. Our 5L emergency water storage jug holds 1.3 gallons and is designed to be portable, with a grab-and-go handle.
How Much Water and Food to Store, and How to Rotate It
Aim for three days minimum. Work up to two weeks if you have space.
For rotation, use a simple system:
- Label everything with the date you bought it
- Store older items in front so you use them first
- Eat from your supply once a month and replace what you use
- Check dates every six months
Food and water you rotate never go to waste. It becomes part of your normal kitchen, not a dusty stockpile.
How to Build a Household Emergency Plan Your Family Will Actually Use
A household emergency plan only works if everyone knows it and it's simple enough to remember. The best plans fit on one page. They answer three questions: where do we meet, who do we call, and how do we get out? But a plan built for a generic household will fail a real one, so this section walks through the base plan first, then the household-specific additions that most guides skip.
The one-page base plan
- Pick two meeting spots. One near home, one outside the neighborhood.
- Choose an out-of-area contact. Someone everyone calls to check in.
- Map two exit routes from your home.
- Write down key numbers on paper, not just in a phone.
- Practice once. A five-minute walk-through beats a perfect document.
Household-specific additions
Children. Keep the plan visual, simple icons for meet spots, contact numbers, and what to grab.
Older adults. Note mobility needs, hearing or vision aids, and any equipment that requires power.
Disabilities and chronic conditions. Build the plan around the person, not the diagnosis.
Pets. Decide now who grabs the dog, the cat, and the carrier.
Medical devices and medications. Keep a written list of prescriptions, dosages, and device model numbers.
Communication when networks fail
Text messages often get through when calls don't. Agree on a check-in time and a single out-of-area contact so everyone reports to the same person.
For families building a fuller kit, our guide on what to pack in a family emergency kit covers the details.
Watch out: the most common failure is a plan that only one adult knows, make sure every capable member of the household can recite the meeting spots and the out-of-area contact without looking.
Planning for the Emergencies You're Most Likely to Face
Planning for likely emergencies beats planning for movie-style disasters. Look at where you live and what actually happens there. A coastal household worries about storms. A cold-climate family worries about power loss in winter.
Start by naming your top three hazards. Most households can do this in five minutes: check your local emergency management agency's website, ask a long-time neighbor, or think back over the last five years of weather and utility outages. Then build a one-page action card for each.
Severe storms and flooding
- Before: clear gutters and storm drains, move documents and electronics to upper floors, photograph your home for insurance, and know whether your street floods.
- During: shelter in an interior room away from windows, avoid driving through standing water, and keep a battery radio on for warnings.
- After: document damage before cleanup, avoid floodwater (it can carry sewage and live wires), and follow boil-water notices.
Watch out: never walk or drive through moving water, even if it looks shallow.
Power outages
- Before: know how to open your garage door manually, keep flashlights (not candles) in each room, and have a plan for refrigerated food and medications that need cooling.
- During: keep the fridge and freezer closed, unplug sensitive electronics, and use a battery or hand-crank radio for updates.
- After: check food safety before eating anything that was held without power.
Wildfire and smoke
- Before: create defensible space by clearing brush and debris near the home, keep N95 masks on hand, and know your evacuation zone and route.
- During: close windows and doors, run a HEPA filter or a DIY box-fan filter, and monitor local alerts.
- After: follow re-entry guidance, photograph damage, and watch for hot spots.
Extreme heat and deep freezes
- Heat: identify cooling centers, keep water accessible, check on older neighbors, and know the signs of heat exhaustion versus heat stroke.
- Freeze: know where your water shutoff is, insulate exposed pipes, and keep a way to stay warm that doesn't rely on a fireplace you've never used.
Short-term water shutoffs
- Before: store at least three days of water and know how to shut off your main valve.
- During: use stored water for drinking and cooking first; use non-potable water for flushing.
- After: run taps briefly and follow any boil-water notice.
One free tool most people skip: weather alerts. Our guide on the National Weather Service as your free early warning system covers how weather alerts can help you prepare.
Watch out: don't build a plan for a disaster that never happens where you live while ignoring the one that does. Match the plan to your map, and revisit it when you move or when your local risk changes.
Keeping Your Kit Ready: Maintenance and Readiness Checks
Keeping your kit ready takes about ten minutes twice a year. Set a reminder for spring and fall. Then run a quick check so nothing rots, expires, or goes missing.
Your check should cover:
- Water: replace stored tap water; check sealed containers
- Food: pull expired items and restock
- Batteries: test flashlights and the radio
- Medications: rotate anything close to expiring
Readiness is a habit, not a one-time purchase. A kit you checked last month works. A kit you built three years ago and forgot might not.
A common mistake is overbuying and never checking. Keep it lean, keep it current, and keep it where you can grab it in the dark.
Run this quick check twice a year, in spring and fall, so nothing rots, expires, or goes missing.
| Item | Check to perform |
|---|---|
| Water | Replace stored tap water; check sealed containers |
| Food | Pull expired items and restock |
| Batteries | Test flashlights and the radio |
| Medications | Rotate anything close to expiring |
| Documents | Update copies if details changed |
| Plan | Confirm phone numbers and meeting spots |
Grab Your Free First 72 Hours Checklist and Get Started
The first 72 hours of an emergency decide how calm you stay. That's why we built a free, no-fluff guide to walk you through it.
Here's your next step. Grab your free First 72 Hours checklist and start with the first five items this week. No bunkers, no politics, no fear. Just a household that's ready for life's curveballs.

At Prep2Survive, we keep it practical. Our curated tools and checklists are designed to help you stay ready without the doomsday drama.
Get started with Prep2Survive and build a kit you'll actually use.
Readiness isn't about expecting the worst. It's about refusing to be caught off guard.
Frequently Asked Questions
How can I prepare for emergencies without becoming a doomsday prepper?
Focus on the emergencies you're actually likely to face, like power outages, storms, and short evacuations. Build a small emergency supply kit, store a few days of water and food, and write a simple household emergency plan. Skip the bunker mentality and the fear-driven shopping. Practical emergency preparedness is about staying calm and comfortable for 72 hours, not surviving the apocalypse. Start with what you already own and add one item per week.
What should a beginner include in an emergency kit?
Start with water, shelf-stable food, a flashlight with spare batteries, a first-aid kit, medications, copies of important documents, a wind-up radio, and basic hygiene items. A ready-made survival first aid and emergency kit covers the medical and tool side so you're not assembling everything from scratch. Add pet supplies if you have animals. Keep it all in one grab-and-go container and check it twice a year.
How much food and water should I keep for an emergency?
FEMA recommends one gallon of drinking water per person per day, so a three-day supply means three gallons per person, plus extra for pets. A portable 5-liter jug holds about 1.3 gallons, which is an easy size to store and carry. For food, aim for three days of non-perishables you actually eat, then rotate them into your regular meals so nothing expires unused.
What are low-cost ways to prepare for an emergency?
Use what you have first: existing flashlights, a spare phone charger, and copies of documents in a ziplock bag. Buy one extra can or bottle of water each grocery trip. Free checklists, like Prep2Survive's First 72 Hours checklist, give you a plan without spending anything. Set a small monthly budget and add one practical item at a time instead of buying a big kit all at once.
